
Our customisable stock Note templates are an excellent starting point for creating a template that feels custom-designed for you. We can also convert existing templates into Kiroku, or you can create a custom template.
We're going to cover quite a lot in this article - links to each topic below.
Add blocks / Add or change lines / Edit any text / Reorder content / Change buttons / Create or edit links / Undo, redo or preview / Revert changes / Copy from a template
To create a brand new template just click on ‘Build template’ in the left-hand sidebar of your dashboard. Give your template a name (you can rename it later).
Your template will already have a section and a line in it so you have somewhere to start from. The following section will help you with building your new template.
Editing templates
There are two ways to get to the Notes Template Editor:
-
From the sidebar, Click ‘Edit Templates’ and pick from your Notes template grid.
-
From your dashboard, hover over the template to edit, click the ‘More options’ (three dots) button, then ‘Edit template’.
To make structural edits to your template, use one of the two options above. Don’t click your template as if you were about to start writing your notes.
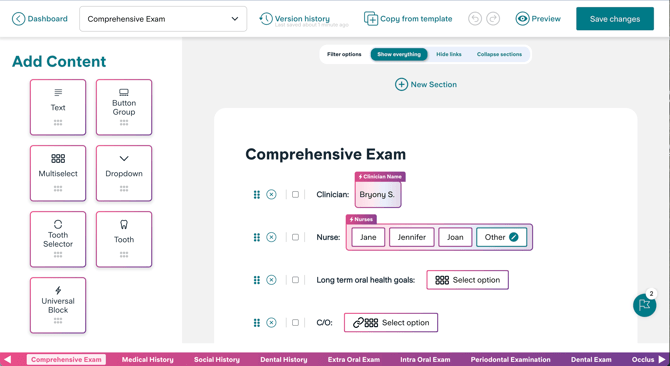
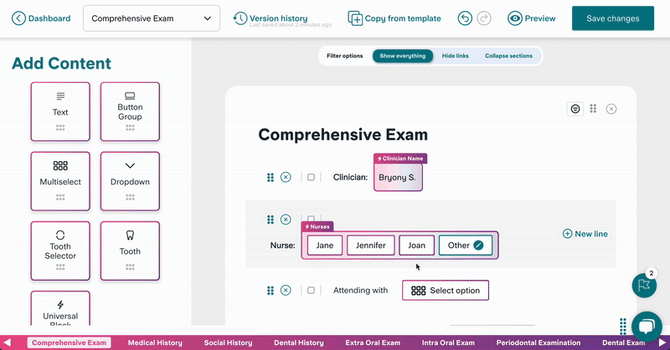
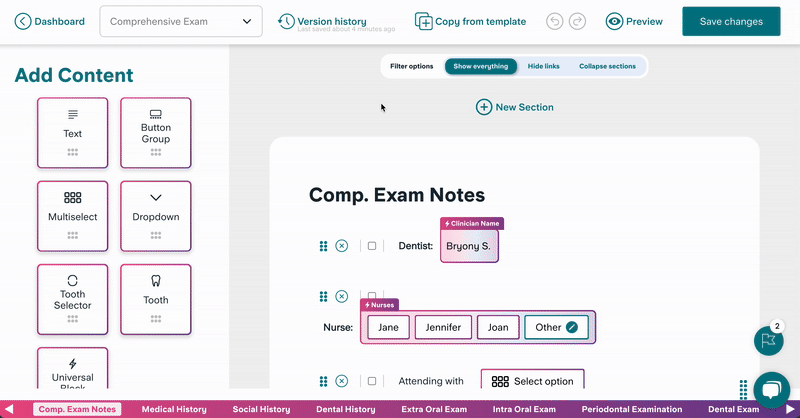
The Template Editor
You’ll meet the Template Editor, which looks like this.
-
Along the top you will find:
The name of the template you’re editing, the Version History, the option to copy from another template, undo and redo buttons, preview your template button, and a save button. - Just below this you can select filter options.
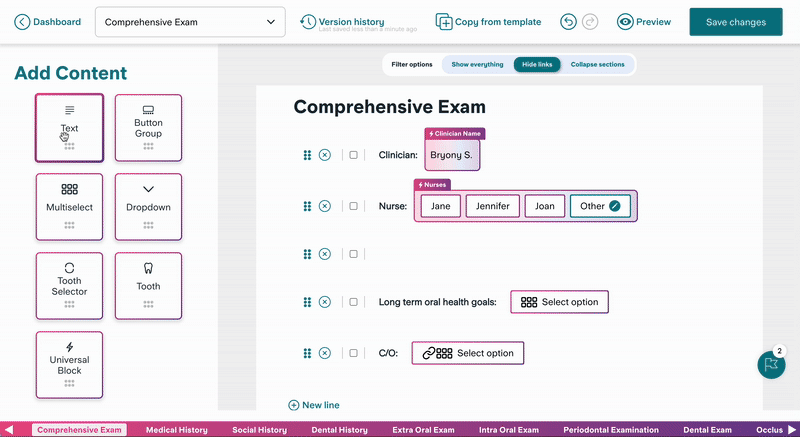
You can show everything, hide liked lines, or collapse the sections down to just see their headings (ideal for reordering sections). -
Along the left are blocks.
These different elements make up your templates and can be dragged and dropped into your template. -
Along the bottom is navigation.
Use this to jump to different sections of your template (faster than scrolling!) -
On the main screen is your template.
You can see the blocks that make up your lines, and the section that group your lines together. You can also see which lines are created by links, and which buttons trigger new lines.
Your template will save as you go. You can see when it was last saved under the version history.

It can help to preview your template as you build it, so you see if it works as you're expecting it to.
Blocks make up the content of your lines. To add blocks to a line, drag blocks from the left sidebar onto your line, or, press the + on either end of an existing block.
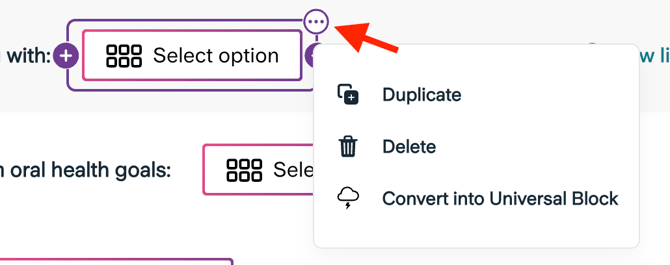
You can also delete and duplicate a block by clicking the 'More options' menu in the top right corner. From here you can also turn this into a Universal Block.
To create a new line, click the + button at the end of the previous line or the 'enter bar' on your keyboard.
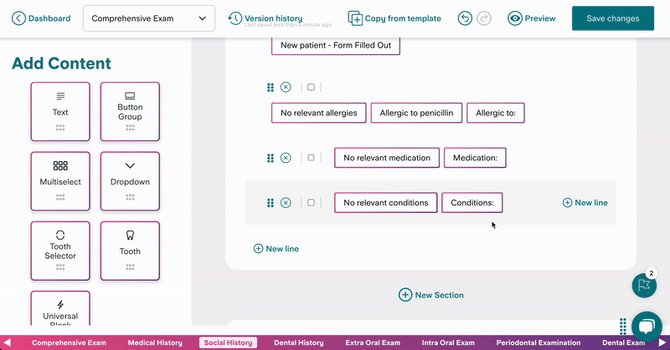
To reorder a line, simply pick up a line by clicking the 6 dot option and moving the line.
To delete a line directly by clicking the x in the circle.
Click on any text and type in the new text you want. This works for section headers, line headers and individual blocks.
To edit button options, hover over the option, single-click on the button and then amend the text in a button using the sidebar. Simply click elsewhere to make the change.
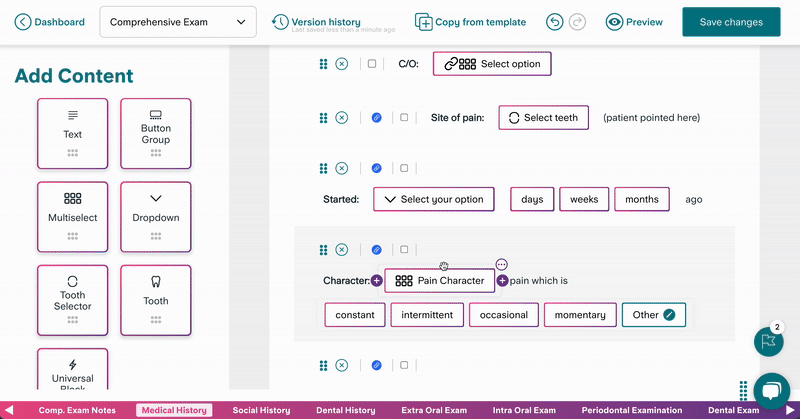
Every block can be dragged and dropped into a new position in the same line or another line. The order of options in a button can also be rearranged. Lines can also be rearranged and dragged to new sections.

Linked lines cannot be positioned before the line that creates them.
You can edit any of the text or the number of options in your buttons or convert it into a different type.
Just click on the button you want to change and then click the button type option in the sidebar. You will see your template update in real-time.
We suggest keeping the 'Other' option as the final option in a button. This removes all button options and allows you to free-text your response.
If changing from a multi-select, remember that other options allow you to only pick one option. If in doubt about how many options you will need to pick, use a multi-select.

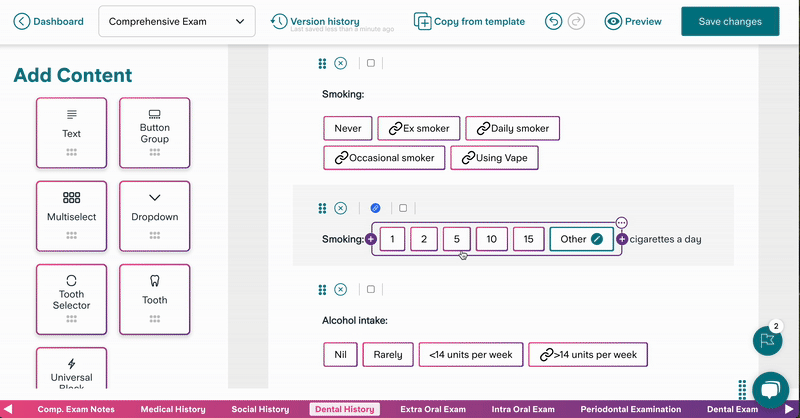
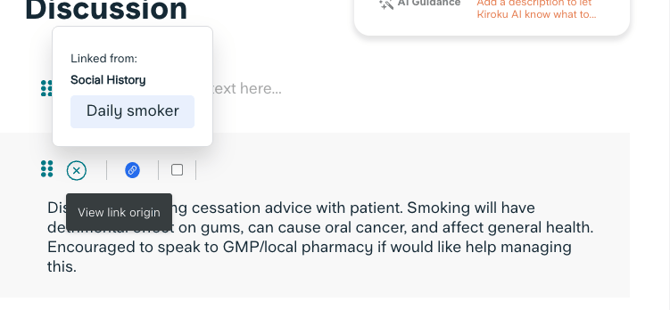
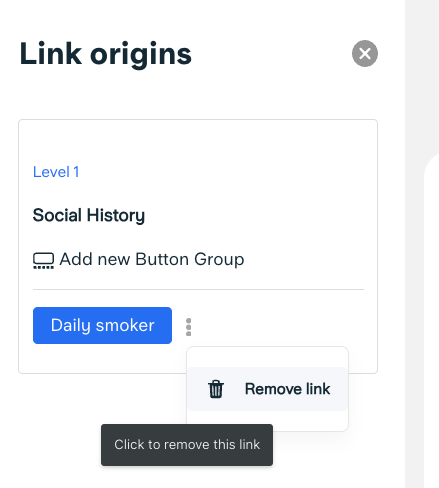
If you hover over the link icon, it will tell you the button that triggers the creation of this line.
In this example, hovering over the link icon on this line tells me it is triggered by the 'Daily smoker' button within the 'Social History' section.
To create a linked line First create the output line. See: How to add a new line
The trigger button and the output line do not need to be in the same section.
For instance, the trigger button might be in the 'Social history' section and the output line in the 'Discussion' section.
To create a new link, first click the checkbox next to the output line.
Then, click on the trigger button group. This opens the sidebar, where you can specify an individual option (or all options) that triggers the creation of the output line.
See the video below for an example of how to link to all button options, one button option, or a selection of button options.
How to Remove a link
To remove the connection between a linked line and its trigger, simply click on the blue linked line icon.
In the sidebar, click the 3 dots next to the trigger button to open the menu. Then click the 'Remove link' option.
You can easily undo and redo your edits. You can also preview how they look in your set of notes by clicking on the preview button. Click through to check your changes are as expected and then 'Exit preview mode' to continue making changes.

You can revert to a previous version of a template or undo changes made to your templates. Via the editor, click on Template Options > See previous versions.
This will bring up a timeline of all your changes where you can preview and revert the template to a previous version.
If there are sections of existing templates, stock or custom, that you know you’re happy with you can also copy them into your new template.
Click the ‘Copy from template’ button at the top of the editor. It will bring up your current template on the left side, and then you can select a template to copy from on the right side.
Once you have chosen your template, you can simply drag sections or lines from the existing template (right) into the new template (left). This will not affect the existing template. You can view as many existing templates on the right side as you need to to build your custom template on the left side.
At the moment you can only drag individual lines or entire sections between templates. You can’t select and drag across multiple lines at once.
Any lines that have linked lines associated with them will also copy across directly linked lines into your new template!
If the lines you want to copy over create linked lines in a different section, please create the section and name it in your new template first.
-
Your section name should match the name of the section in the template you are copying over (e.g. Diagnosis or Discussion). This is so that Kiroku knows where you want these new lines to live once copied into the new template.
-
If you don't create the section to house these linked lines, they either won't copy across, or they will copy over in the same section as that from which they originate. You will then need to manually drag them to different sections.
-
To avoid this, first copy over the sections where these linked lines are created - they will copy over as empty initially. Once you copy over the section that houses the lines they originate from, then these linked lines will be populated for you.
Copying across can be complicated and help from our team might be needed.
If you have any problems or questions please in touch with us:
- Send us a live chat within Kiroku
- Complete the 'Contact us' form
- Send us an email